Ensuring Safe and Effective Blood Transfusion: A Step-by-Step Clinical Guide
Learn the step-by-step clinical procedure for performing a safe and effective blood transfusion. This guide covers preparation, patient monitoring, administration, and post-transfusion care to ensure best practices in nursing and medical settings.
PROCEDURE: Blood Transfusion
PURPOSE
To treat blood loss or to supply blood component your body can not make for itself
INDICATIONS
Anemia, Hypovolemic shock, Major surgical operation, severe burns victim, hereditary disorders etc.
PREPARATION
NURSE
- Clean uniform (dress or gown).
- Hair tied properly
- Remove watch, jewelery, etc.
- Wash hands.
- Data-collection.
- Identification of the patient.
- Physical and psychological condition of the patient.
- Assess and understand the patient's pathology.
- Verify medical prescription.
- Check the patient's blood group and Rh factor.

PATIENT
- Respect patient privacy
- Evaluate the patient's capacity to understand and collaborate
- Inform and explain the patient/family: objective, procedure, of care.
- Assess the puncture site for hygiene and integrity
- Assure that clothing can be withdrawn easily.
- Make sure that the test of compatibility has been completed accurately.
Material
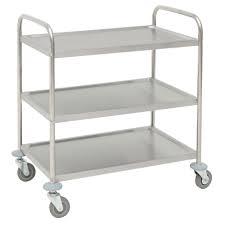
- Cleaned and disinfected trolley/tray.
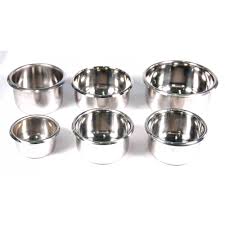
- Sterile cup/gallipot
- Gauze / sterile pads.
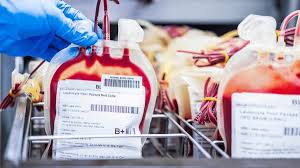
- Unit of blood, same blood group and type
- Check the unit of blood (name of the patient, blood group and Rh factor of the donor and receiver, Bed number, blood aspect, expiry date).
- Check the blood's temperature.
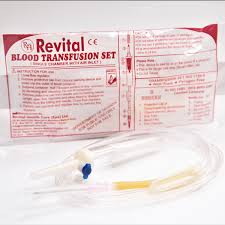
- Transfusion set
- Adapted catheter.
- Tourniquet
- Kidney dish.
- Protective gloves.
- Protection for bed.
- Scissors.
- Adhesive tape.
- Bracket.
- Container sharp objects.
- Disinfectant (alcohol).
- Splint.
- Watch with second hand.
- Label.
- Material for taking vitals signs.
IMPLEMENTATION
- Wash hands.
- Check medical prescription.
- Select the limb opposite from the dominant side (left for right-handed and right for left- handed persons).
- Determine, with the patient, the position of the arm
- Place protection under the limb to be punctured.
- Inspect the patient's veins, looking for one near the surface
- Take vital signs.
- Prepare the transfusion set

- * Move the drip regulator approximately 5 cm from the dropper.
- * Close the drip regulator
- Disinfect the cap of the bottle / nozzle of the bag.
- Connect the transfusion se to the bottle / bag
- Hang the bottle and tubing to the bracket.
- Fill the dropper until the filter is entirely immersed with blood.
- Open the drip regulator and prime the tube with blood.
- Close the drip regulator and replace the cap on the end of the tube
- Hang the transfusion set to the bracket.
- Apply protective gloves.
- Locate the vein, stimulating the circulation, if necessary.
- Place the tourniquet at approximately 10 cm above the puncture site.
- Massage along the vein in the direction of venous return
- Select the vein.
- For 1 minute widely disinfect the selected puncture site
- Take the catheter packing and open it.
- Visualize the vein and begin by stretching the skin downward below the anticipated
- venipuncture site with the opposite hand to anchor the vein and limit vein movement
- Penetrate in the vein, either from the top, or from the side.
- Puncture the vein using direct or indirect entry:
- Direct (one step, used for larger veins): Hold the over-the-needle assembly at 15 to 20 degrees above the site and enter the vein directly.
- Indirect (two steps, used for smaller veins): hold the assembly 15 to 20 degrees above the site and 20 degrees lateral to the vein, insert the catheter into the skin, and then advance into the vein.
- When the vein is punctured, blood should appear in the flash chamber: withdraw slightly the needle while slipping the catheter into the vein.
- Put a small compress below the end of the needle.
- Remove the needle by slightly pressing on the skin from the top of the catheter extremity.
- Maintain the catheter holder in place.
- Loosen the tourniquet and remove it.
- Quickly connect the transfusion set to the catheter.
- Open the drip regulator and adjust it to the prescribed rate of transfusion
- Slip sterile gauze under the catheter pavilion.
- Fix the catheter with adhesive tape
- Adjust the flow according to the prescription.
- Place the label (name of the patient, n° of bed, dates, hour of beginning, hour of end, flow rate )
- Evaluate the reactions from the patient.
- check vital signs after 15 minutes, monitoring for an adverse reaction
- Check the vital signs every 30 minutes.
- Carefully monitor the patient throughout the transfusion process!
COMPLETION
Patient
- Position the patient comfortably and appropriately
- Arrange personal effects of the patient and put them within reach.
- Thank the patient for his or her collaboration.
Material
- Eliminate waste and separate the sharp objects
- Clean and arrange the material.
- Nurse
- Education/ Care-related guidance.
- Document, sign and deliver verbal or written report of Care provided
- Wash and disinfect hands.
- Monitor the infusion
As nurses or midwives you have to monitor this patient until the transfusion end, when there is change in temperature or any allergy to the patient you have to stop transfusion immediately.